Part 2: Scaling in Amazon AWS VPC with Docker, Docker Machine, Consul, Registrator, HAProxy, ELK and Prometheus
Contents
General
In the previous post I demonstrated scaling on a local VirtualBox environment using HAProxy based load balancing with added service discovery and scaling over multiple nodes on Docker Swarm. In this article I show how the updated scripts can be used to control an environment running on Amazon Virtual Private Cloud (VPC) environment.
Update on 6.10.2015! The scripts have been quite extensively updated and
cleaned up for presentation in OpenSlava 2015. I’ll describe the new
functionality in a separate blogpost later, but have updated this so that the
commands should work. Major addition has been the setting up of private registry
both locally and in AWS and loading the images there. This also supports the
experimental overlay network version of the demo. For launching containers for
images not in the private registry use the shell script ./startExtService.sh
as the default ./startService.sh tries to fetch the image from the private
registry.

Setting up the Amazon VPC
An AWS account that allows for creation of VPC instances is needed. I did the next steps through the web UI, but they could also be done using the awscli. After signing in, choose the region you want to use and then choose VPC from the Services menu.
- Select “Your VPCs” and create a new VPC instance and note down the VPC id. I used 10.10.0.0/16 as the CIDR block
- Create a subnet for that VPC, I used IP range 10.10.0.0/24 for the subnet
- Create an Internet Gateway
- Create a route between 0.0.0.0/0 and the created Internet Gateway under Route Tables->Routes
Test that docker-machine works with the settings by creating a test machine (thanks to Brent Salisbury for a good article). Be patient as the command takes a while to execute. If you’re interested on what happens in a more detailed level, add -D flag to the command to get debug information.
1
docker-machine create --driver amazonec2 --amazonec2-access-key <AWS_ACCESS_KEY_ID> --amazonec2-secret-key <AWS_SECRET_ACCESS_KEY> --amazonec2-vpc-id <AWS_VPC_ID> --amazonec2-zone <ZONE> aws-test
Now you can run a “Hello world” test in the new instance with
1
docker $(docker-machine config aws-test) run alpine echo "Hello world!"
After you have used Docker Machine to create the first node the security group docker-machine should be created. I had to add an inbound rule “ALL TRAFFIC” within the security group (so that the target for the rule is the security group’s own id) to get visibility between the Swarm nodes. I did that through the AWS UI, but it could also be done through the awscli.
Setting up awscli
AWS Command Line Interface is a convenient way to
configure settings in the VPC. Installation on Mac is easily done with brew
install awscli. After that run aws configure and enter the information for
your Amazon account and you’re set.
I suggest that you also add the command line completion to your bash_profile (or
similar), the information is given when you install with brew or you can review
it with brew info awscli.
Setting up environment variables for docker
The scripts I created check the existence of environment variable AWS_ACCESS_KEY_ID. After setting up the following environment variables there’s no need to repeat them in all the commands.
1
2
3
4
5
export AWS_ACCESS_KEY_ID=<secret key>
export AWS_SECRET_ACCESS_KEY=<secret access key>
export AWS_VPC_ID=<vpc-id>
export AWS_DEFAULT_REGION=<region>
export AWS_ZONE=<zone>
If the AWS_ACCESS_KEY_ID is unset, the instances will be created locally on
top of VirtualBox. At the moment the scripts don’t support mixing servers
locally and in AWS, so that you first need to run docker-machine rm for local
servers before creating them in AWS. Adding support for a mixed environment
should be trivial.
Starting the example
To start up an environment with the infra node, three swarm instances and ten instances of the test service the following commands can be used
1
2
3
4
5
git clone https://github.com/SirIle/docker-multihost.git && cd docker-multihost/swarm
./setupRegistry.sh
./createInfraNode.sh
for i in {0..2}; do ./createSwarmNode.sh $i; done
for i in {1..10}; do ./startService.sh hello/v1 node-image-test; done
Then you need to add the rule for (at least) port 80 in the security group for your own IP. This can be done through the web UI or with the aws cli.
1
aws ec2 authorize-security-group-ingress --group-id <security-group-id> --protocol tcp --port 80 --cidr $(curl checkip.amazonaws.com)/32
In case you later want to revoke the access, it can be done with the command
1
aws ec2 revoke-security-group-ingress --group-id <security-group-id> --protocol tcp --port 80 --cidr $(curl checkip.amazonaws.com)/32
Testing the result
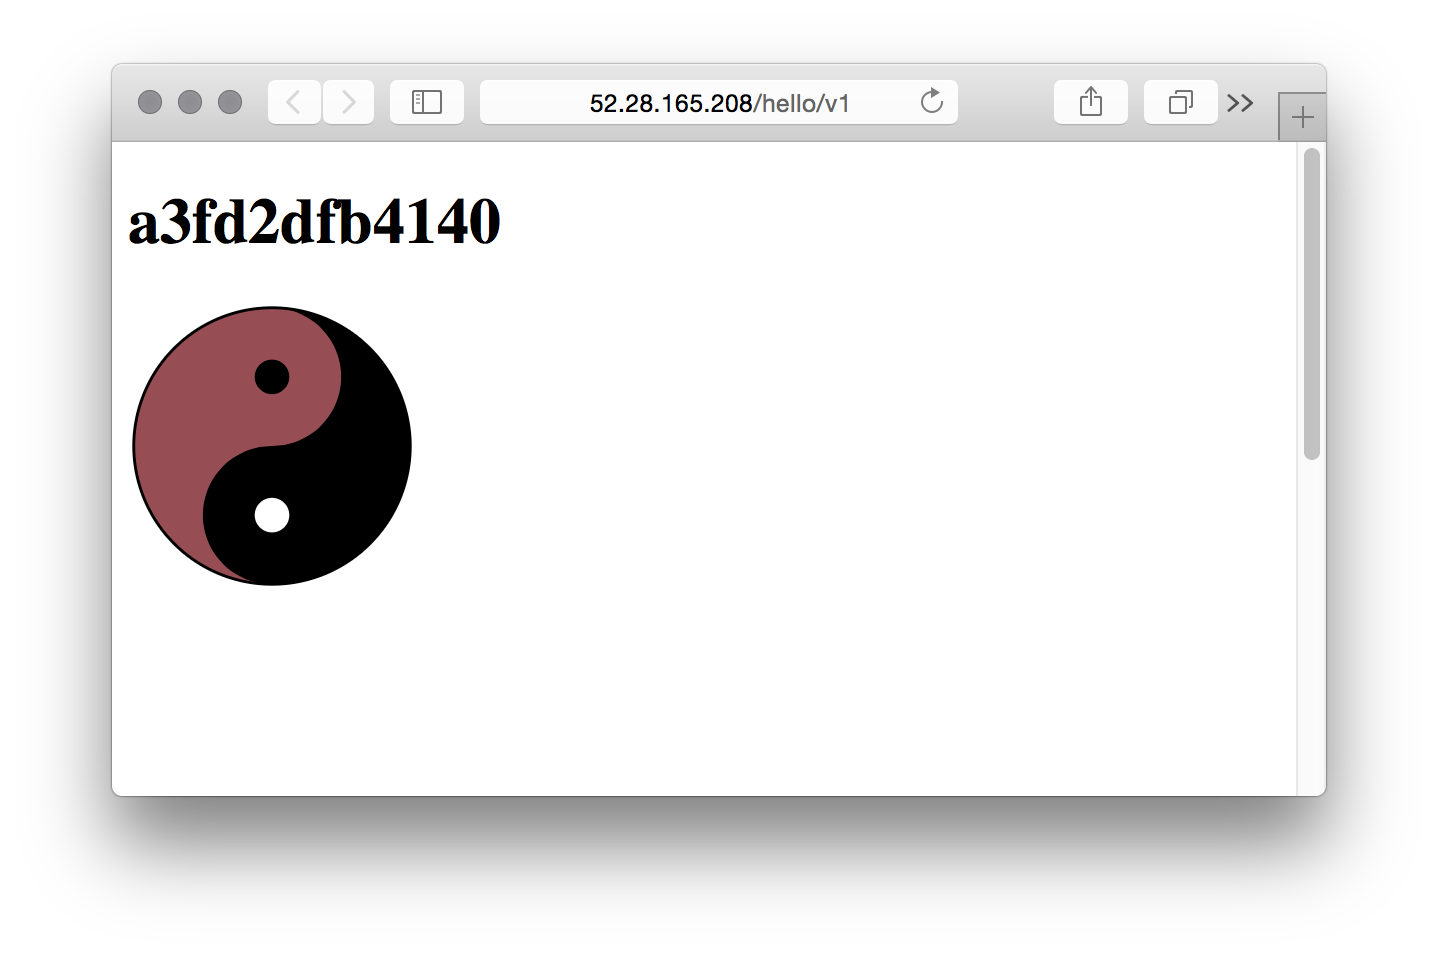
Now the browser can be pointed to the address that is displayed by the startService.sh script. The test service returns an image with the color devised from the hash of the hostname, so all instances return a different color image. Demonstrating scaling visually by adding and removing services and nodes should be easy.

Adding logging and monitoring
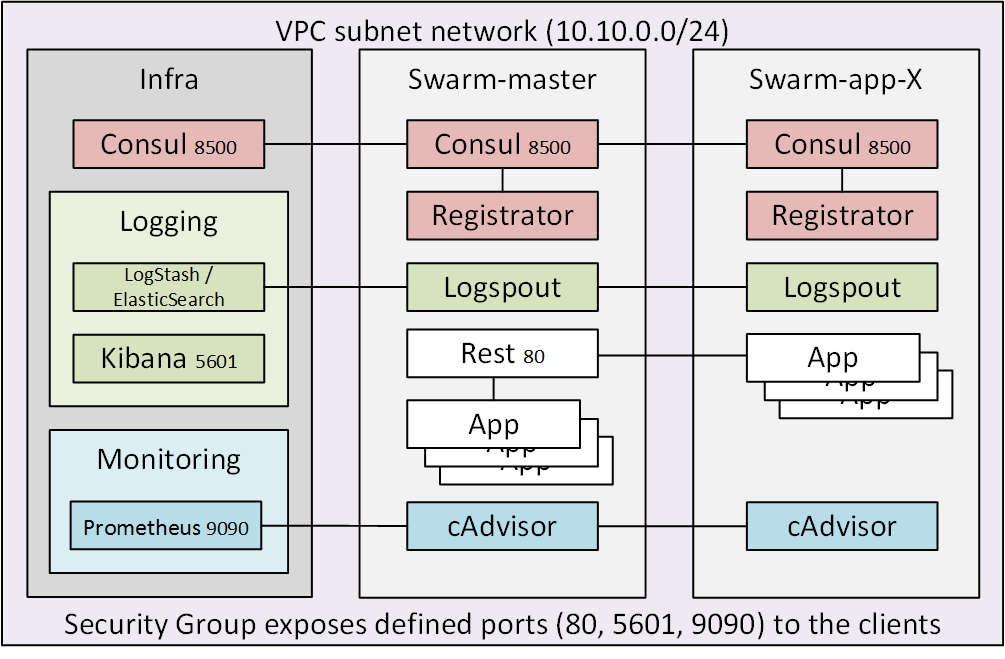
The addLogging.sh and addMonitoring.sh scripts work also against the AWS instance. They are described in more detail in the first post. Remember to add the ports to the inbound rules if you want to use the Web UIs. Port 8500 is for Consul, port 5601 for Kibana and port 9090 for Prometheus. Easiest way is to use the previously shown aws command to add the ports to the security group, just change the port 80 to the port you want to access.
Caveats
As the communication between nodes happens inside the VPC and all the Consuls have been configured to advertise the VPC internal IP addresses joining the local Consul to the Consul network isn’t feasible unless there is a VPN tunnel between the local host and the AWS VPC.
Comments